Category Archives: Uncategorized

Star Trail Photography with the Canon TC-80N3 Remote

Last weekend I tried star trail photography for the first time. Using a long exposure, you can record the apparent movement of the stars caused by the Earth’s rotation. I’d originally wanted to do this the previous weekend, but upon waking up in the middle of the night I discovered that my cheap knock-off remote switch refused to work in the 20 degree temperatures. I was hoping to do half-hour-long exposures, which requires using the “bulb” setting on the camera. Bulb means that the shutter will stay open as long as you hold it down. You can’t do this with the camera’s shutter button, because you would inevitably shake the camera by having your hand there the whole time. That’s where the remote switches come in.

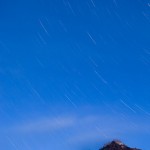
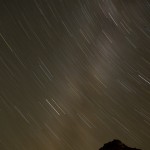
So, given that I was going to have to shell out the money for a proper switch, like the Canon RS-80N3, I figured I would go all the way and get the TC-80N3 instead. The key feature here is that it includes an interval timer. The following series of photos was taken over a span of six hours, and the really interesting part is that I was asleep the whole time. Take a look at the images, and then I’ll tell you how they were made. You can click through to see a gallery with larger versions.

The TC-80N3 lets you set the length of the exposure, the time between images and how many images to take. Each photo is a half hour exposure at f/4. That gives enough light and time to make the star trails. The long exposure noise reduction on my 1Ds Mark III needs to take a “dark frame” after each frame, so each image actually takes an hour. I set the timer to take a new 30 minute image every hour…turns out the interval is measured from end of one image to start of the other, so I ended up with the exposures starting every hour and a half. I should have set it for 30 minutes to allow just enough time for the noise reduction. The TC-80N3 also has a delay function, which you might be able to use to delay the whole sequence. So it might be possible to set it up to start taking pictures once it gets dark enough, then run through the whole night…if you have enough battery power (more about that later). In this case I was already awake from taking a static shot of the Milky Way, so I haven’t tried using the delay yet.

The first and last images are my favorites, but I also think it’s interesting so see how the clouds rolled in for a while in the middle of the night. That last image really is a single exposure. I was hoping to make something like it, just before dawn. It ran from 5:10 AM to 5:40 AM, so the star trails were able to mix with the predawn light. I also like how you are able to see detail in the mountain. I’m looking forward to trying some more images like this.

I was really impressed with the battery life of my 1Ds Mark III. Everything I’d read suggested that I would only get through one or two long exposures on a single battery, but after making these four images my camera still reported that the battery was roughly half full. Temperatures were probably in the high 30’s, so maybe it takes significantly colder weather to really kill battery life. Cameras with older/smaller batteries probably won’t fare as well, so you should experiment for yourself.

One quirk of the TC-80N3 is that it wasn’t at all clear how to use mirror lock-up. I eventually discovered that I could set the camera’s drive mode to 2-second timer and enable mirror lock-up. Then when the TC-80N3 starts the exposure, the camera raises the mirror and waits two seconds before actually starting the exposure. You can add 2-3 seconds onto your exposures to compensate for this delay. Other cameras may behave differently. I think the TC-80N3 is a useful tool, and I’m looking forward to seeing what else I can accomplish with it. If you get one for yourself, make sure you learn how to use it at home first. There are a lot of possible settings combinations, and you don’t want to find yourself fumbling around in the middle of the night on your first shoot with it.
Field Report: Image Storage


One of the concerns when going on a long trip is what to do with all the images you take. Usually I have enough memory cards for a day of shooting, so I need to download images every night. Sometimes you can bring your regular laptop, but it might not be practical if you’re traveling somewhere remote…one has to worry about electricity, weight and the risk of theft/loss/damage to an expensive laptop. So what are the alternatives?
Dedicated photo viewers are one option. These consist of an LCD screen and memory card reader wrapped around a hard drive. You can download images onto the device and play them back if you want. When you get home, it plugs into your computer like any other external drive. I used an Epson P-2000 for my trip to southern Africa a few years ago, and it worked fine. Reviewing images was a little slower than I would have liked, but I was still able to make some selects and share the day’s photos with my fellow travelers. However, I took a big risk by only bringing a single viewer…there was no backup of my images. What if the internal drive had failed?
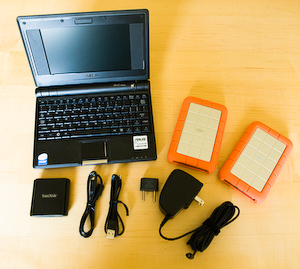
For my recent trip to Madagascar, I knew I wanted some redundancy. And I was up against some very tight weight restrictions for the internal flights, so I knew I needed something light. Buying two photo viewers would be prohibitively expensive, especially since I wanted a lot of space for my RAW files. The new category of cheap, linux-based, mini laptops known as “netbooks” provided an alternative. The Asus Eee PC was the first of these machines and the only one available when I was preparing for my trip. Since then its spawned a host of imitators. I opted for one of the lower-spec versions, which cost me about $350 and weighed around 2 pounds. Along with the Eee PC, I brought two external USB hard drives and a USB CompactFlash card reader for downloading my images. With two drives, I could have a backup of my photos in case one drive failed.
I’d initially hoped to use the laptop for viewing my RAW files to check sharpness and make initial selects. There’s some basic photo viewing software included, and it’s possible to install additional programs from the internet. However, I couldn’t find anything that could handle the RAW files from my 1Ds Mark III. So instead I decided to take advantage of the dual memory card slots in my camera and shoot small JPEGs onto an SD card (the Eee happens to have a built-in SD card reader). Then I could view the JPEGs in the field and just copy the RAW files for later.
So how did it all work out? Very well. I had no trouble downloading photos during the trip, and my images were all intact when I got home. Both drives did fine, so I didn’t “need” the backup, but that’s the way it goes with these things…if I hadn’t had a backup maybe I would have come home without any photos! It turned out that everywhere we stayed had reliable access to power, so I didn’t seriously test the battery life of the Eee PC. When I got home I sold the laptop and the external drives. By the time I get to take another trip like that, I figure I’ll be able to buy something twice as good for half the price.
I’m still disappointed that I wasn’t able to view my RAW files in the field. Next time I’d look for a netbook with Windows XP, of which there are many…you can even get the Eee PC with Windows pre-installed. I could have tried to install Windows myself before the trip, but I didn’t have the time to mess around with it. With a Windows based machine I might even be able to run Lightroom and start doing keywording and selects in the field. Although I’m not sure how well it would run on a relatively slow machine like that.
Overall I think it was a good solution to the storage problem. The Linux OS that the Eee PC came with took a little getting used to, but if you’re comfortable with computers you’ll probably find it pretty easy to learn the basics. I’d recommend reading some detailed reviews and trying one for yourself before you commit to it. And like with any new piece of gear, make sure you figure out how to use it before you leave home.
Next time I’ll add even more redundancy…I had two hard drives, but that single laptop was my only way to download the images. If it had failed, I would have been out of luck. Instead of a second drive, I want to look into the cheaper photo viewers that have no screen (okay, so I they’re not really “viewers” anymore). They’re just a hard drive and card reader in a single package and are much less expensive than models like the Epson. Normally I would use this device as a regular hard drive to hold my backup set of images, but if the laptop were to die I could start using the built-in card reader to download directly to the drive.
Update: I forgot to mention that the color and contrast of the LCD screen is okay, but not great. Maybe it’s possible to create a ColorSync profile with Linux, but I don’t know how. Being able to profile the screen and make it more accurate would be another reason to run Windows XP instead.

Madagascar Equipment Report

Now that I’ve had some time to recover from my Madagascar trip, I wanted to write a bit about how my equipment choices worked out. In this article I’ll talk about the camera, lenses, etc. while actually shooting. In the next article, I’ll talk about my solution for backing-up and downloading images while on the trip.
This was my first time shooting in a jungle environment, and I found that it presents some interesting challenges. First of all, it’s dark…very dark. Most of my images were shot at 1600 ISO, which on the 1Ds Mark III is a very good compromise between sensitivity and noise. Still, I could have used an even higher ISO in some cases, and for many of my macro shots with the 180mm lens I was shooting lots of frames at 1/50 sec to make sure I ended up with some that were sharp enough. If you’re a Nikon shooter, a the D3 or the D700 would probably be great for this kind of trip. Some kind of image stabilization is a must, whether it’s IS/VR in the lens or a tripod/monopod or both. I often found that there was no room or time to setup my whole tripod, such as when photographing fast moving frogs on a pandanus plant. Instead, I would sometimes use my tripod like a monopod by extending the legs and leaving them folded together to form a single support.
Second, it can be hard to compose clean images with so many trees around. Either there are branches between you and the subject, or the background is full of crisscrossing branches or flat gray sky. Mostly this problem is solved by patience and having a good guide, but I also wished for a lens like a 300mm f/2.8. On a full-frame body like the 1Ds, this would have been an ideal lens for photographing lemurs in their environment while still having a nice shallow DOF to clean up the backgrounds. Although the lemurs sometimes come down close to the ground, I often wished that I could get up into the canopy to be on their level.
Third, it’s wet. This one is more obvious, and I planned ahead for it. I used a wonderful belt system from Think Tank Photo so that I wouldn’t have to keep setting a backpack down on wet, muddy ground. All the lens pouches have their own removable rain cover, and there are lots of well thought-out details. My Canon camera body and L-series lenses are all weather sealed and stayed dry on the one really rainy day that we had. However, my Sigma 180mm macro lens is not sealed, so I brought an Aquatech raincover to protect this lens. I was less pleased with this, as it was quite fiddly to take the cover on and off the camera body when changing lenses. Another option would have been to buy the more expensive Canon 180mm macro, which is weather sealed. A word of caution: even the weather sealed bodies and lenses will not necessarily stand up to sustained rain, and unfortunately Canon doesn’t provide any guidelines as to how much rain is “too much”.

More frequent posts

I’m going to start a new “photo of the day” project. I’ll try to post a new image every day, or maybe every other day 🙂 See above for the first post. These photos will be visible on the welcome page of the site, or by visiting the blog. You can also subscribe to the RSS feed to be notified whenever there’s a new post.

Back from Madagascar


I’m back from Madagascar. It was an amazing trip. We visited Amber Mountain National Park in the north and Andasibe and Mantadia National Parks in the east. Photographically it was quite challenging…this was my first time shooting in a jungle setting, and it turns out to be quite difficult to isolate the animals from all the trees. It’s also very dark under the canopy, so I was always using 1600 ISO. I’ve posted a gallery with some of my Madagascar images.

Tom McCall Preserve


I woke up really early this morning and drove to the Columbia Gorge for sunrise. My destination was Tom McCall Preserve, a plateau that is protected by the Nature Conservancy. At this time of year it’s covered with native wildflowers…primarily balsamroot and lupine. The weather was cloudy when I arrived, but I set off up the trail anyways. Luckily the sun broke through as I was climbing the ridge, and I was treated to one of the most beautiful natural displays I’ve ever seen.